Showing posts with label cabin top. Show all posts

Thursday, September 17, 2020

Three Years In

This September marks three years since the boat materials arrived. Since then I have spent most everyday, in social isolation, working away making plywood sheets into the larger boat structure. The social isolation was good training for the Trump Flu that has put everyone in isolation.  As I trend high on the introvert scale, social isolation is not a hardship for me. 

Out of the 37 full sheets of plywood received, only six remain full sheets.  I'm on the last five epoxy gallons of the twenty estimated to complete the boat.  More materials are needed but current situations place obstacles in the path to obtain additional materials.  This does not yet impede progress as much remains to be done with the structures and materials on hand.

Above the starboard hull is hollywooded up with all the hatches and the solar powered ventilator/light fake installed.  Work easing the transitions between surfaces must be done before this hull is ready to receive fiberglass.

Chocolate brown epoxy fillets ease the surface transitions that the fiberglass must conform to.

Sanding and an application of the green fairing compound, followed by another sanding, completes the fillets.  

The bow and stern receive fillets.

A bit of sanding and the stern is ready for fiberglassing.

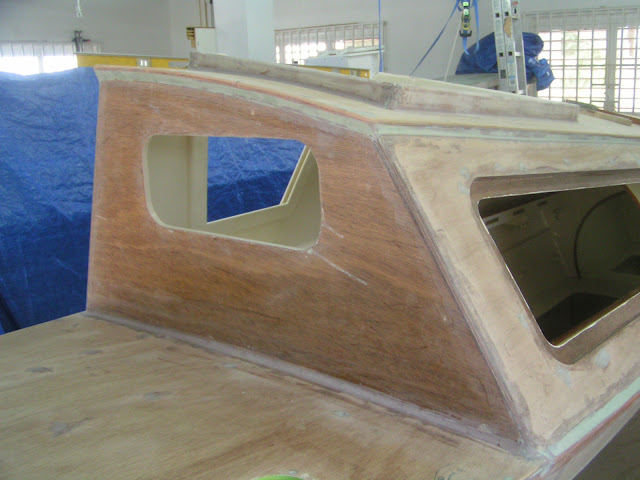
Forward and aft cabin ends (as well as the sides) received a roof line brow that protrudes 3/8 of an inch from the cabin surfaces.  The brow feature is copied from the larger Tiki 38 version.  The brow adds a shadow line that emphasizes the curving roof and echos the crossbeam curve that will be mounted on the deck below.  I think it gives the hull a very jaunty look.

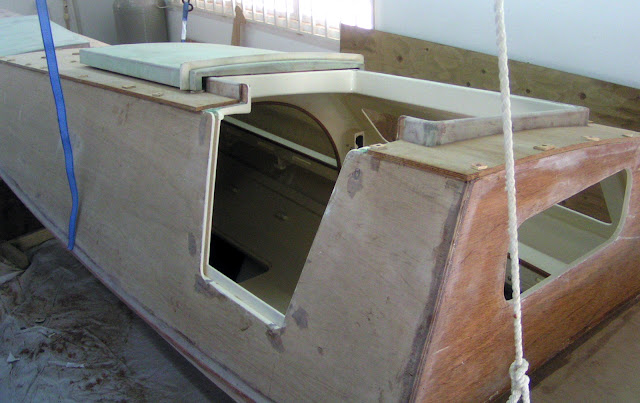
This is the inboard side of the starboard hull with parts of the washboard closing up the companionway.  The cabin side slopes so that any water between the washboard and the cabin side can pool at the bottom.  It is difficult to see, but weep holes are made near the bottom corners to allow the water to drain away and help prevent rot.  Weep holes are also visible at the top on either side of the companionway opening.


 Above is a closeup of the forward weep hole at the top of the companionway opening.  Water can leak into the gap between the roof and the opening cover (shown moved to the right).  The roof slopes so that water will drain towards the cabin interior.  A rasp was used to create a sloping groove that will direct water down the cabin side rather than inside.  I more rasp work sloping will be required to assure this will work correctly.  Multiple fiberglass applications to these intricate surfaces will be necessary for  waterproofing.  


The bow and stern receive fiberglass in multiple applications.  The fiberglass is applied to the sides and the epoxy is allowed to cure.  The fiberglass is then trimmed and sanded to taper the edges.  The tapered edges help blend in the following fiberglass applications that cover the edges and other features.

The starboard deck, cabin and shear stringers now sport fiberglass protection.  Covering the shear stringers required fiberglass cut on the bias to conform to the shapes.  It was a hell of a time for my orbital sander to disintegrate, but I soldiered on; sanding by hand as much as needed to accept the next fiberglass application.  When it was all covered I was fortunate to locally source a new orbital sander.  My lesson with this was that it is better to sand the day after the fiberglass was applied than to delay and sand the fully hardened epoxy at a later time.
I've left the fiberglass to cover the aft port light and aft solar powered ventilator/light openings.  This should help to reduce the dust making its' way into the hull.  Much dust is sure to be generated in fairing (smoothing) the hull before painting.


I'm uncertain if I have enough epoxy to completely fiberglass one hull.  I also thought I could get a break from sanding (not the case when there is a boat to build) if I branched off into cutting out the three crossbeams that will tie the two hulls together.  Of course these beam components require two coats of epoxy followed by ..... sanding. 

Above are the main crossbeam plywood components at a length of 14 feet, 8 inches.  This gives an idea of the boat's width which seems very spacious to this former Hobie 16 skipper.  

The crossbeams will gain additional strength by timbers installed on the upper and lower surfaces.  In boat building, timber is a generic term for a piece of lumber.  I feel more like I'm building out of sticks and twigs rather than timbers.  The needed lumber is about a 1/2 hour drive away, but I am not able to travel that far.  My pickup blew out a brake line so that it was shooting brake fluid out the wheel well as the pedal went to the floor.  All the brake lines are held together by rust encrustations and must be replaced.  The upside is the brake line gave up just outside my gate.  The downside is I don't feel like fixing it and my mechanic wasn't working at last check.  I'm left with the pleasure of scooter rides for the time being and maybe regrets for selling my bicycle should the scooter also give up.


Wednesday, July 29, 2020

What's Hatching?

During this build process I've kept both hulls in the same state of completion.  As the interior fitments are mostly complete, attention is directed to finishing the hull exteriors.  The shop dimensions require one hull to be placed on a dolly and rolled out of the way and the other hull to be suspended into the newly created space.  This arrangement permits the suspended hull to be rotated 90° to shape and finish the keels as well as the hull exterior surfaces.  The hulls will depart from identical states of competition at this point due to space constraints and some material shortages.

This image may not look impressive, but it represents a fare amount of work in preparing the hull for fiberglassing.  Fiberglass doesn't go over sharp bends so transition easing fillets are needed.  Fillets have been applied between the keel/lower hull panel, between the upper/lower hull panels and between the hull panels/stem and stern.  The deck/shear stringer was rounded over and finished out with filler.  Each fillet requires about three passes to complete.  Each pass starts will a round of sanding followed by an application of the filleting compound.  One full lenght fillet is about all the sanding and filling I want to do in one day so multiple days were consumed in preparing both sides of the starboard hull for fiberglassing.  I confess, this was not a job I had great enthusiasm for, but it has to be done.  In the end it was gratifying to see the hull surfaces moving closer to the finished state.

The main hatch coaming and painted arcs are installed.


Above, the cabin top is screwed to the gently curving substructure for the first time.  This deviation from the flat top plan looks great to me.  In the previous episode I had issues that created a saddle shaped cabin top.  The multiple arcs provide the support necessary to create a uniform curve in the 3/8" plywood cabin top. 

The cabin hatch is shown in the closed position here.

In some cases it is easier to paint parts before installation than to paint them once installed.  When this is the case it is necessary to accurately mark and mask areas not requiring a finish.  With the cabin top screwed on it was time to go inside and mark the top underside epoxy joining areas.  These areas do not receive a finish to avoid compromising the epoxy bond.  My initial idea was to paint the top underside with the same off-white used on the interior.  Marking off the underside I noticed how much more visually interesting it is to see the off-white structure contrasted against the unpainted wood.  The underside top surface is slated to receive two epoxy coats before any finishing coats.  Much work can be saved by varnishing rather than painting the top underside and the end result will be much more visually pleasing! 


In the closed position, the hatch drip rail overhangs the inner coaming.  The white hatch collar will face against a housing mounted aft of the coaming.  These features should help exclude water from the interior.

 The beginnings of a washboard prevent interior entry.


Remove the washboard and open the hatch extends a welcome to the interior.