The decks must receive cleats at both bows and sterns. The bow cleat above has had the mounting holes drilled oversized. The holes were filled with an epoxy mixed with a high density additive and later drilled to accept the fasteners. The epoxy filling distributes the fastener loads and seals plywood at the mounting holes. The high density additive improves the filling's compressive and bearing strengths. I hope to sleep well believing my anchor line will not be tearing out deck cleats.
The bow deck undersides receive reinforcements adjacent to the cleat fastener holes.
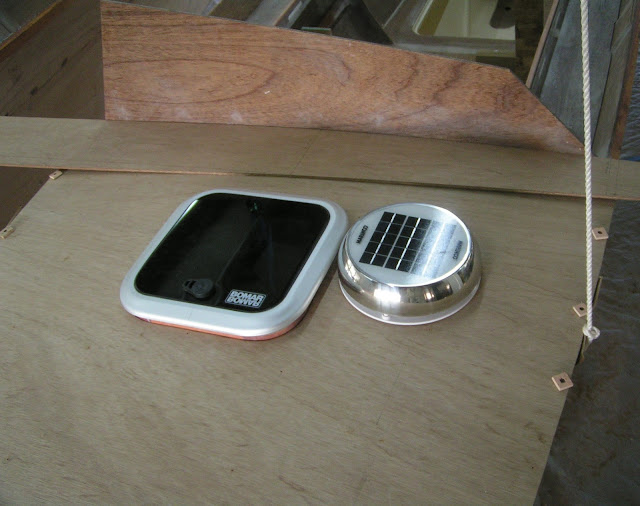
Some may look at the image above and wonder what kind of a solar powered robot vacuum cleaner I have. What is shown is the outside face and the inside face of solar powered ventilators. I have two for each hull, one supplies air and the other exhausts it. These ventilators have a battery that is charged during the day so that the fan runs day and night. Good ventilation is key to avoiding mold, fungus and other funk. The fore and aft decks will be holed to receive the ventilators (resolving a last episode cliffhanger).
While solar powered ventilators are not new, this brand has a unique feature that I was excited to find. There is a built in LED light that will illuminate the dark compartments and lockers that would otherside not receive light.
Here the forward deck has been holed to receive the ventilador. The aft decks also received similar holes. The options for ventilador placement were limited and restricted by stringer locations, hatch clearance, cross beam clearance, as well as the internal shelving. I can't say the ventilador does positive things for the esthetics, but it sits in an out of the foot traffic location as well as being easy to reach and operate from the inside. This is a case where I would say, "There is no perfection, only compromise".
This is a below deck ventilator view. Wooden rings have been fabricated to fit around the ventilator below deck. The ring will give the above deck mounting fixture something to screw into besides 1/4" plywood.
My steam bending efforts have produced positive results after soaking the kiln dried lumber in water for a week. A newly steamed length of molding is shown clamped to the bending form in the required shape. The image also shows two examples of specially milled molding for the aft bulkheads.
Above, the steamed wood is drying while held in the desired shape. The steamed wood has a U shaped cross section that fits over and softens the bulkhead's plywood edge. Two U shaped lengths will be fitted to finish the bulkhead's edge. Similar molding will be applied to all interior bulkhead openings, providing my steam bending successes continue.
The molding, mentioned with the bending form, is shown in position at the bulkhead opening top. The aft cabin bulkhead opening molding has small radius corners that I would not attempt or succeed with by steam bending. Unlike the previous bulkhead, the aft molding has an L cross section rather than a U cross section. Several steps were employed to create the corner radius moldings.
Fortunately, I have a fly cutter to cut wooden disks or semicircles of any desired size. Above is the fixture used to route a circular rabbet around the semicircle's perimeter. The circular rabbet's inside radius matches that of the bulkhead opening.
The readjusted fly cutter cuts the rabbeted semicircle's inside diameter. Cuts are then made to create two corner moldings after the edges receive a 1/8" radius. More attention should have been paid to the wood grain orientation as these unattached parts are very fragile.
Here two steam bent, L shaped moldings are clamped to the bending form for the lower portion of the aft bulkhead molding. A square filler piece is placed in the L's mouth to present a square cross section to the clamping forces.
New shelves are held up by temporary supports in the forward bunk compartment to the left. The shelving theme is emerging with the slotted fiddles capped by varnished mahogany. An arrangement of netting and bungee cord below the shelves could be used to store clothes and other items. I need to flesh out this idea before the shelves are installed.
My previous hope of reducing the chaos of a hoarders lair by installing the decks no longer seems wise. Some future operations will be much easier without installed decks. Meanwhile, I'm engaged in multiple sub projects at various stages of completion. It has been said that a point in every direction is the same as no point at all. I'm pointing for a future sudden assembly event where the boat's state of completion takes a decided jump in a short period of time due to the completed sub projects. My scrap piles are turning into smaller scraps and the new parts require a place to be, adding to chaos. Progress will somehow continue as I shuffle along my hoarder's trails while forgetting the purpose of my quest upon arrival at some remote shop location. Yet, I look forward to starting progress each new day


