Sunday, December 27, 2020

Hopeful 2021

 I think most everyone will be happy to put the year 2020 in the rear view mirror.  Belize had done so well in the early pandemic by holding the number of cases to 24 until this fall.  Each day, 100 new cases are identified, as the case count continues climbing towards a peak.  2020 ends on hopeful notes with covid vaccines on the way bringing prospects for a return to normal life.  All of this swirls around me leaving my existence unchanged as this day, like everyday, is a good day for more boat sanding.

I've been a bit limited in the work that can be done due to a lack of materials and hardware.   The focus has been on completing a number of smaller tasks left languishing.

The washboard assembly has a coaming section that does not clear the fixed coaming when inserting the washboard assembly.  This is because the washboard slope is different from the coaming slope.  The solution is to cut the coaming section ends to a triangular shape matching the washboard slope thereby clearing the fixed coaming.

All surfaces exposed to water must be fiber glassed for protection.  Above, areas adjacent to the washboard weep hole receive a fiber glass sheathing.

The 16 beam lashing pads receive fiberglass on all surfaces.  Can you spot the one pad that has had the fiberglass trimmed, sanded and the mounting holes restored?

It is a common modification to add a cross beam to the stern.  This beam will support the aft trampoline as well as a boarding ladder.  Four additional lashing cleats were made for the aft beam.  

The port hull has received fiberglass coverings on the decks and shear stringers.  The hull is inverted to accept fiberglass spanning across the keel.  This is the first of three layers of 6 oz. (per sq. yd.) fiberglass on the keel.  This will be followed by two layers of 1708 (17 oz. per sq. yd.) on the keel.  These layers will provide abrasion resistance to the hulls so that the boat may be beached without worry.  

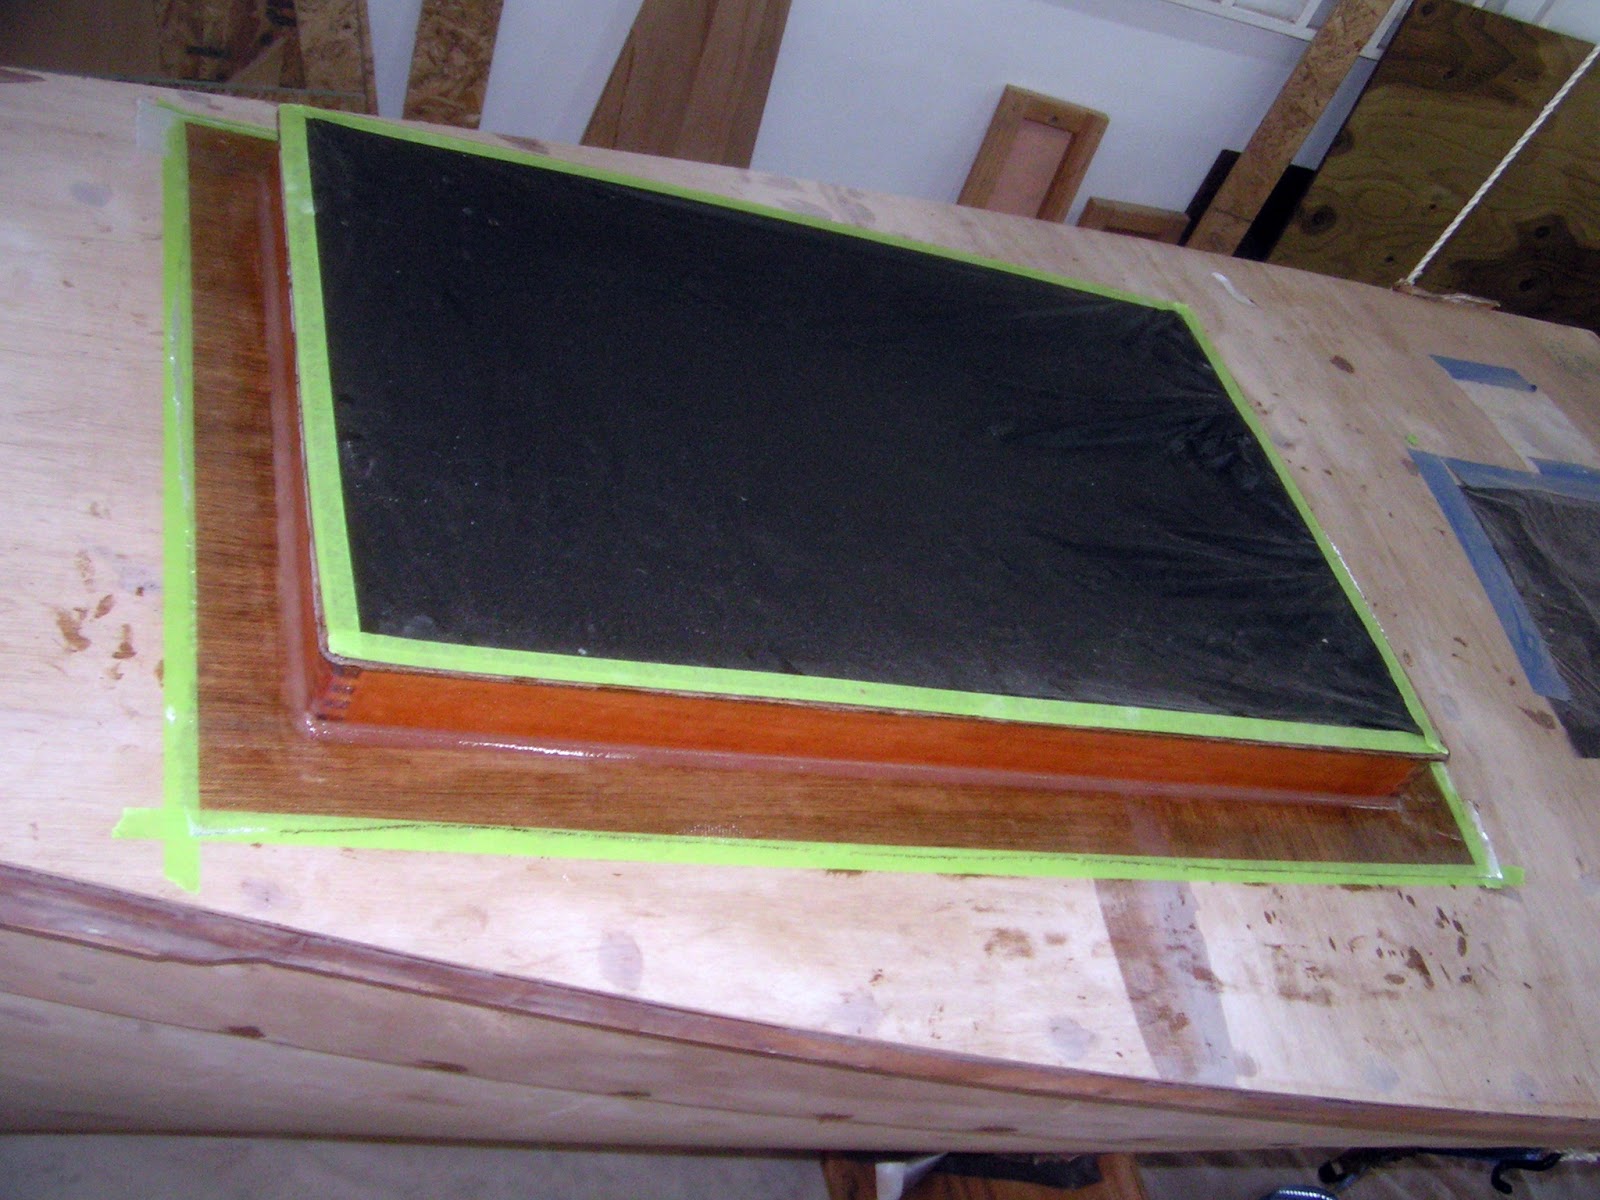
An odd low spot was discovered on the hull and corrected with green fairing compound and long board sanding.

Above the port hull is turned on its side so that lengths of fiberglass can be laid over to determine the amount needed to cover a hull side.  Four lengths were cut for future installations.

I was excited to find the piano hinges and hatch prop rods in the latest shipment along with five gallons of epoxy.  The head compartment above has the new hardware temporarily installed.  

The piano hinge must be let into the lid to account for the closed thickness.  My first efforts were on a router table that produced less than successful results as witnessed by the green filler shown above.  Better results were produced with a handheld trim router working against a screwed on wooden fence.

Sail track slides were also received for the main hatches, but lumber was not available for this installation due to difficulties the rainy season imposed on logging.  

Another shipment will arrive soon that will contain the 1708 fiberglass and other fiber glassing supplies that will assist with hull fiberglassment.  There will not be much I can do until more materials and supplies arrive.

Thursday, September 17, 2020

Three Years In

This September marks three years since the boat materials arrived. Since then I have spent most everyday, in social isolation, working away making plywood sheets into the larger boat structure. The social isolation was good training for the Trump Flu that has put everyone in isolation.  As I trend high on the introvert scale, social isolation is not a hardship for me. 

Out of the 37 full sheets of plywood received, only six remain full sheets.  I'm on the last five epoxy gallons of the twenty estimated to complete the boat.  More materials are needed but current situations place obstacles in the path to obtain additional materials.  This does not yet impede progress as much remains to be done with the structures and materials on hand.

Above the starboard hull is hollywooded up with all the hatches and the solar powered ventilator/light fake installed.  Work easing the transitions between surfaces must be done before this hull is ready to receive fiberglass.

Chocolate brown epoxy fillets ease the surface transitions that the fiberglass must conform to.

Sanding and an application of the green fairing compound, followed by another sanding, completes the fillets.  

The bow and stern receive fillets.

A bit of sanding and the stern is ready for fiberglassing.

Forward and aft cabin ends (as well as the sides) received a roof line brow that protrudes 3/8 of an inch from the cabin surfaces.  The brow feature is copied from the larger Tiki 38 version.  The brow adds a shadow line that emphasizes the curving roof and echos the crossbeam curve that will be mounted on the deck below.  I think it gives the hull a very jaunty look.

This is the inboard side of the starboard hull with parts of the washboard closing up the companionway.  The cabin side slopes so that any water between the washboard and the cabin side can pool at the bottom.  It is difficult to see, but weep holes are made near the bottom corners to allow the water to drain away and help prevent rot.  Weep holes are also visible at the top on either side of the companionway opening.


 Above is a closeup of the forward weep hole at the top of the companionway opening.  Water can leak into the gap between the roof and the opening cover (shown moved to the right).  The roof slopes so that water will drain towards the cabin interior.  A rasp was used to create a sloping groove that will direct water down the cabin side rather than inside.  I more rasp work sloping will be required to assure this will work correctly.  Multiple fiberglass applications to these intricate surfaces will be necessary for  waterproofing.  


The bow and stern receive fiberglass in multiple applications.  The fiberglass is applied to the sides and the epoxy is allowed to cure.  The fiberglass is then trimmed and sanded to taper the edges.  The tapered edges help blend in the following fiberglass applications that cover the edges and other features.

The starboard deck, cabin and shear stringers now sport fiberglass protection.  Covering the shear stringers required fiberglass cut on the bias to conform to the shapes.  It was a hell of a time for my orbital sander to disintegrate, but I soldiered on; sanding by hand as much as needed to accept the next fiberglass application.  When it was all covered I was fortunate to locally source a new orbital sander.  My lesson with this was that it is better to sand the day after the fiberglass was applied than to delay and sand the fully hardened epoxy at a later time.
I've left the fiberglass to cover the aft port light and aft solar powered ventilator/light openings.  This should help to reduce the dust making its' way into the hull.  Much dust is sure to be generated in fairing (smoothing) the hull before painting.


I'm uncertain if I have enough epoxy to completely fiberglass one hull.  I also thought I could get a break from sanding (not the case when there is a boat to build) if I branched off into cutting out the three crossbeams that will tie the two hulls together.  Of course these beam components require two coats of epoxy followed by ..... sanding. 

Above are the main crossbeam plywood components at a length of 14 feet, 8 inches.  This gives an idea of the boat's width which seems very spacious to this former Hobie 16 skipper.  

The crossbeams will gain additional strength by timbers installed on the upper and lower surfaces.  In boat building, timber is a generic term for a piece of lumber.  I feel more like I'm building out of sticks and twigs rather than timbers.  The needed lumber is about a 1/2 hour drive away, but I am not able to travel that far.  My pickup blew out a brake line so that it was shooting brake fluid out the wheel well as the pedal went to the floor.  All the brake lines are held together by rust encrustations and must be replaced.  The upside is the brake line gave up just outside my gate.  The downside is I don't feel like fixing it and my mechanic wasn't working at last check.  I'm left with the pleasure of scooter rides for the time being and maybe regrets for selling my bicycle should the scooter also give up.


Wednesday, July 29, 2020

What's Hatching?

During this build process I've kept both hulls in the same state of completion.  As the interior fitments are mostly complete, attention is directed to finishing the hull exteriors.  The shop dimensions require one hull to be placed on a dolly and rolled out of the way and the other hull to be suspended into the newly created space.  This arrangement permits the suspended hull to be rotated 90° to shape and finish the keels as well as the hull exterior surfaces.  The hulls will depart from identical states of competition at this point due to space constraints and some material shortages.

This image may not look impressive, but it represents a fare amount of work in preparing the hull for fiberglassing.  Fiberglass doesn't go over sharp bends so transition easing fillets are needed.  Fillets have been applied between the keel/lower hull panel, between the upper/lower hull panels and between the hull panels/stem and stern.  The deck/shear stringer was rounded over and finished out with filler.  Each fillet requires about three passes to complete.  Each pass starts will a round of sanding followed by an application of the filleting compound.  One full lenght fillet is about all the sanding and filling I want to do in one day so multiple days were consumed in preparing both sides of the starboard hull for fiberglassing.  I confess, this was not a job I had great enthusiasm for, but it has to be done.  In the end it was gratifying to see the hull surfaces moving closer to the finished state.

The main hatch coaming and painted arcs are installed.


Above, the cabin top is screwed to the gently curving substructure for the first time.  This deviation from the flat top plan looks great to me.  In the previous episode I had issues that created a saddle shaped cabin top.  The multiple arcs provide the support necessary to create a uniform curve in the 3/8" plywood cabin top. 

The cabin hatch is shown in the closed position here.

In some cases it is easier to paint parts before installation than to paint them once installed.  When this is the case it is necessary to accurately mark and mask areas not requiring a finish.  With the cabin top screwed on it was time to go inside and mark the top underside epoxy joining areas.  These areas do not receive a finish to avoid compromising the epoxy bond.  My initial idea was to paint the top underside with the same off-white used on the interior.  Marking off the underside I noticed how much more visually interesting it is to see the off-white structure contrasted against the unpainted wood.  The underside top surface is slated to receive two epoxy coats before any finishing coats.  Much work can be saved by varnishing rather than painting the top underside and the end result will be much more visually pleasing! 


In the closed position, the hatch drip rail overhangs the inner coaming.  The white hatch collar will face against a housing mounted aft of the coaming.  These features should help exclude water from the interior.

 The beginnings of a washboard prevent interior entry.


Remove the washboard and open the hatch extends a welcome to the interior.


Monday, June 15, 2020

Top Side

Above are the frames and 1/4" plywood tops for the the main cabin hatches.  These are forward sliding hatches that will cover inner coamings.  Notice that the foreground ends are open to clear the coamings and that the tops will mate to the gently curving frame surfaces.

Above, the main hatch top has been installed and the exterior is covered with fiberglass fabric.  A green filler compound has been applied and is sanded to create a smooth surface by removing minor imperfections.  This repetitive process is known as fairing and will be applied to all the vessel's exterior surfaces.  It is fair to predict a sanding filled future for me.

Resting on the hatch is a length of thin plywood with 60 grit sandpaper attached to the underside.  This is known as a longboard or torture board by those who use them.  The longboard averages out the surface to take down the high spots and helps reveal the low spots for the next round of faring.  I have seen three men on one longboard fairing the surface of a larger vessel.

A collar was added near the main hatch open end after fairing.  The open end will slide into a housing that seats against the collar face to help exclude water from the interior.

A groove is cut on the underside edge of the hatch's open end.  The groove extends past the inner coaming end in the closed position.  This groove prevents water from bridging across and entering the interior.  Water will instead collect at the groove edge and drop off as an additional measure should any water makes its' way into the housing. 

Plan A and Plan B

In spite of previous experience; I hoped that the 3/8" plywood cabin tops would nicely conform to gentle bulkhead curve without requiring additional structure.  The resulting saddle shape was not meeting my ambitions.  Time for a plan B.


The plan B longitudinal stringers provided sub-marginal improvement in the saddle shape.

In the background can be seen the green forward locker lid part way through the fairing process.

Plan C1 and C2


 Transverse arcs are the great hope to achieve the plan C2 gently curved cabin tops.  This can not be tested until the arcs are painted and installed as they are presently held in place by screwed on wood scraps resting on the cabin side lips.  There is only a small area to epoxy the arcs to the cabin lips so loads applied while bending the top over the curves must be kept low to prevent bonding failures.  The 3/8" plywood top will be epoxied to the structural members.  My plan is to screw the top to each of the arcs starting in the center and working outward.  This will mostly confine the bending forces on the arc rather than the arc/lip bond.  I long to declare success with this method in a future episode.  Should this fail, there will be a significant mess to recover from.

In the background, aft cabin area, can be seen the main hatch inner coaming.  This is the structure the main hatch will slide over.


Plan C1 was to lighten things with arcs 3/4 of an inch thick.  This proved way too bendie for success.


Above is an arc in the raw form.  The pencil lines show the compound angle that must be measured and cut on each end of every arc.  The compound angle is cut on one end and then the saw is set up for the other end.  Laying out these cuts resulted in longer pieces than needed, but repeated cuts on one end with the same saw setting allows sneaking up on the correct length to seat the arc as needed.  Once seated, marks are made at the cabin lips to position the arc template for finishing with rough arc cutting and arc pattern routing operations.

Jam Rock Murals

Corozal has been spruced up with new murals.  I like the ones on the Jam Rock bayside bar.


I like the lady's eyes.

Another Top Side


The newly finished house in December 2016.  By 2020 it was starting to look tired and run down.


Newly finished house in June 2020.  The house looks larger and more imposing.  Why do this you might ask:


The East facing dormer has leaked since day one.  I cut holes below the dormer so the water could be caught as it poured in.  The dormer structure was rotting and other roof issues indicated it was time to do something.


The crew has installed a steel ridge beam as the wooden structure is removed.  The lumber and roofing materials were donated to a nearby Belizean who lives in a one room house with his wife and two kids.  He has a start on a second room expansion and he should be able to finish it with the donated materials.


The new roof is an all steel structure firmly anchored to the new concrete columns as well as steel structures surrounding the former dormer windows.  I have confidence it will do much better in a storm than the previous wooden structure.  The heavy wooden structure was pushing the walls out and creating a crack in a bathroom corner.  At this stage the house is a solar oven.  It later received R11 insulation that greatly deadens the deafening sound experienced in the old structure during rain storms.


The finished interior is a bit stark and sterile compared to the old structure, but someday contrasting paint on the partitions it will spark things up.  


This stitched together image is a bit distorted, but I'm greatly pleased with the revised deck living space.  It now features handrails as well as tongue and groove flooring replacing the splintery gapped floor boards.  I'll have to endeavor in finding furnishings to enjoy this space!

I heartily recommend LLP Constructors Ltd. (info.llpconstructors.com) for your construction needs in the Corozal area.  The crews are well equipped with good tools and a good work ethic.  The director, Peter Maurmann, is a Canadian national of proud German heritage with the German virtue of thoroughness.  His Belizean partener, Luis, is the site foreman.  He is a person with a stream of good ideas, always thinking ahead to keep the project moving.  Both are very pleasant and easy to work with.  Thanks Peter and Luis, my expectations were exceeded.


Saturday, April 25, 2020

Hatching a Plan


Regular readers may be quick to notice something new and different on the forward ends.  If it is not obvious I will contain my disappointment, only to point out the newly constructed hatches for the forward lockers.  The new additions required more time and effort than I would have anticipated, but fret not for the details are soon revealed.  These hatches are larger than normally found on other examples of Tiki 26s.  The larger size is to accomodate a composting head in the starboard hull.  The hatches feature a gentle curve and form a double coaming.  Gentle curve is largely understood, but coaming coupled with double may impose learning on the readers.  I have only, just now, learned the correct spelling of coaming.


The hatch frames and tops received two coats of epoxy and a sanding before assembly.  The tops are 1/4" plywood bent over the frame's gentle curve.  Initially the frames did not have the three stringers extending from one curved end to the other.  The hatch tops took on the shape of a saddle without additional features to encourage the shape of a cylindrical section.  First, arc segments spanning the hatch width were applied to the top underside, but this arrangement did not change the saddle shape.  Next, the plywood was kerfed (parallel saw cuts almost through the material thickness) to encourage a bend following the curve.  One top panel shows the kerf cuts filled with green epoxy.  The only effective solution was to run the three stringers from one curved end to the other.  The stringer ends are reduced in thickness to clear the inner coaming allowing the hatch to seat against the outer coaming (learning: double = inner and outer).

Plywood forming a saddle shape over the curved forms was first observed with the cabin top trial fitting in the last episode.  Constructing the locker hatches will served as a pathfinder for applying corrections to the cabin top.  Curves applied to the various tops is a deviation from the flat tops detailed in the plans.  The flat tops seem crude and aesthetically unpleasing to my eye.  The locker hatches will serve as mounting locations for flexible solar panels.  The hatch stringers and curved shape will strengthen and stiffen the solar panel mounting substrates.

Double Coaming


Coaming is a surface intended to deflect water.  Double coamings are a proven method of producing water tight hatches without relying on a sealing material.  The water must take an unlikely tortuous path in order to reach the vessel's insides.  Above, the locker hatch is propped open over the head compartment. The compartment opening is surrounded by the taller inner coaming.  A 1/4" lip extends outward from the inner coaming top  to help deflect water from the inside.  The hatch seats against the much lower outer coamings spaced outside the inner coaming's perimeter.  

Water attempting to board the vessel must pass through a very small gap between the hatch and outer coaming, squirt across a gap to hit and travel up the inner coaming, then be redirected to the outer coaming by the inner coaming lip.  Water will lose energy at each of these encounters and then fall into the trough between the inner and outer coamings.  All bets on water tightness are off should the hatches be submerged.  A gap at the outer coaming's lowest points (image: lower and upper right) allows water to drain from the space between inner and outer coamings. 


The hatch requires a minimal gap when seated against the outer coaming to resist water intrusion.  Small holes are drilled through the coaming and hatch to accept green fishing line used to clamp the mating surfaces together as the epoxy sets between the deck and outer coaming.  This arrangement assured a minimal gap, flush outer surfaces and permitted thickened epoxy to be worked into the larger gaps between the deck and coaming.  The drilled holes are later epoxy filled by syringe injection.  Too much time and effort was spent attempting shape the coaming's face contour to match the deck when thickened epoxy is so forgiving with approximate fits.


The double coaming system creates narrow spaces that are not easily maintained or refurbished.  Care was taken to assure all areas are water proofed with a fiberglass covering.  Above the inner coaming side and surrounding trough area are water proofed.


Above edges of the outer coaming are fiberglassed.  For these narrow parts I find it easier to set the parts close together and cut a single piece of fiberglass fabric to cover them all in one operation.  The coamings received fiberglass on the three sides not in deck contact.  Once fiberglass is applied, no additional work can be performed with the part until the epoxy cures and the excess fiberglass is cut away the next day.


I have found that a sharp chisel is about the best way to clean up and flush out fiberglass overhang.

Hinges, latches, prop rods and screws are required to complete the hatches.  These items will have to wait until we exit the coronaverse.  Until then other things will receive my attentions.