Saturday, April 25, 2020

Hatching a Plan


Regular readers may be quick to notice something new and different on the forward ends.  If it is not obvious I will contain my disappointment, only to point out the newly constructed hatches for the forward lockers.  The new additions required more time and effort than I would have anticipated, but fret not for the details are soon revealed.  These hatches are larger than normally found on other examples of Tiki 26s.  The larger size is to accomodate a composting head in the starboard hull.  The hatches feature a gentle curve and form a double coaming.  Gentle curve is largely understood, but coaming coupled with double may impose learning on the readers.  I have only, just now, learned the correct spelling of coaming.


The hatch frames and tops received two coats of epoxy and a sanding before assembly.  The tops are 1/4" plywood bent over the frame's gentle curve.  Initially the frames did not have the three stringers extending from one curved end to the other.  The hatch tops took on the shape of a saddle without additional features to encourage the shape of a cylindrical section.  First, arc segments spanning the hatch width were applied to the top underside, but this arrangement did not change the saddle shape.  Next, the plywood was kerfed (parallel saw cuts almost through the material thickness) to encourage a bend following the curve.  One top panel shows the kerf cuts filled with green epoxy.  The only effective solution was to run the three stringers from one curved end to the other.  The stringer ends are reduced in thickness to clear the inner coaming allowing the hatch to seat against the outer coaming (learning: double = inner and outer).

Plywood forming a saddle shape over the curved forms was first observed with the cabin top trial fitting in the last episode.  Constructing the locker hatches will served as a pathfinder for applying corrections to the cabin top.  Curves applied to the various tops is a deviation from the flat tops detailed in the plans.  The flat tops seem crude and aesthetically unpleasing to my eye.  The locker hatches will serve as mounting locations for flexible solar panels.  The hatch stringers and curved shape will strengthen and stiffen the solar panel mounting substrates.

Double Coaming


Coaming is a surface intended to deflect water.  Double coamings are a proven method of producing water tight hatches without relying on a sealing material.  The water must take an unlikely tortuous path in order to reach the vessel's insides.  Above, the locker hatch is propped open over the head compartment. The compartment opening is surrounded by the taller inner coaming.  A 1/4" lip extends outward from the inner coaming top  to help deflect water from the inside.  The hatch seats against the much lower outer coamings spaced outside the inner coaming's perimeter.  

Water attempting to board the vessel must pass through a very small gap between the hatch and outer coaming, squirt across a gap to hit and travel up the inner coaming, then be redirected to the outer coaming by the inner coaming lip.  Water will lose energy at each of these encounters and then fall into the trough between the inner and outer coamings.  All bets on water tightness are off should the hatches be submerged.  A gap at the outer coaming's lowest points (image: lower and upper right) allows water to drain from the space between inner and outer coamings. 


The hatch requires a minimal gap when seated against the outer coaming to resist water intrusion.  Small holes are drilled through the coaming and hatch to accept green fishing line used to clamp the mating surfaces together as the epoxy sets between the deck and outer coaming.  This arrangement assured a minimal gap, flush outer surfaces and permitted thickened epoxy to be worked into the larger gaps between the deck and coaming.  The drilled holes are later epoxy filled by syringe injection.  Too much time and effort was spent attempting shape the coaming's face contour to match the deck when thickened epoxy is so forgiving with approximate fits.
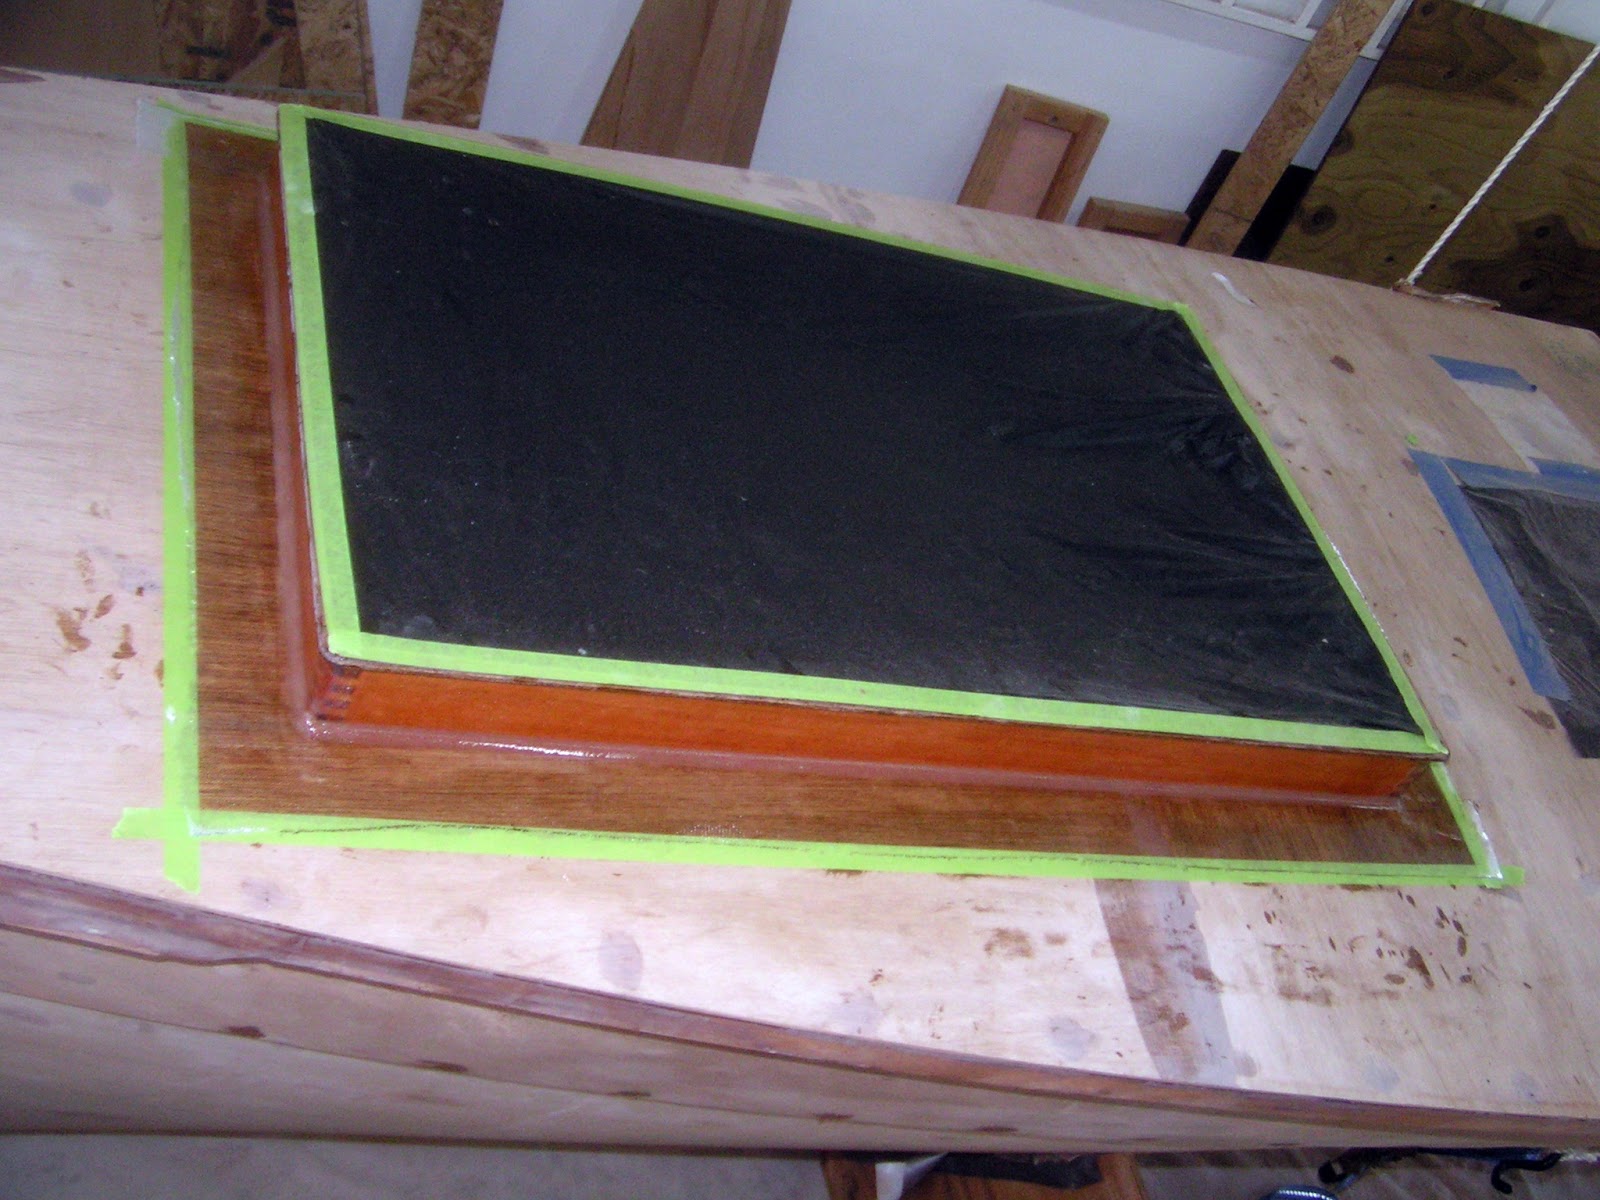

The double coaming system creates narrow spaces that are not easily maintained or refurbished.  Care was taken to assure all areas are water proofed with a fiberglass covering.  Above the inner coaming side and surrounding trough area are water proofed.


Above edges of the outer coaming are fiberglassed.  For these narrow parts I find it easier to set the parts close together and cut a single piece of fiberglass fabric to cover them all in one operation.  The coamings received fiberglass on the three sides not in deck contact.  Once fiberglass is applied, no additional work can be performed with the part until the epoxy cures and the excess fiberglass is cut away the next day.


I have found that a sharp chisel is about the best way to clean up and flush out fiberglass overhang.

Hinges, latches, prop rods and screws are required to complete the hatches.  These items will have to wait until we exit the coronaverse.  Until then other things will receive my attentions.


Friday, March 27, 2020

Closing In


I've deviated from the plans in the cabin side installations.  The plans call for epoxy fillets to join the bulkheads to the cabin side corners.  Wooden cleats are installed in the corners instead to facilitate the next image's major feature.


A generous radius is applied to all exterior cabin corners.  The wooden cleats strengthen corners that would otherwise be compromised by cutting a large radius.  Radiused corners will give the boat a more finished appearance.  


The bulkheads received arced tops rather than the plan's flat tops.  The cabin roofs will have a gentle curve rather than a crude flat surface.  Cleats are fitted to the upper cabin sides so that they follow the bulkhead's top curve.


The square cut cabin side edges are planed off to flush up with the cleats and bulkhead top curves.


A tool box and bucket serve as stools while working on the outboard cabin sides.  This hull is against the wall.  The hull suspension was altered to provided working room between the wall and the hull.  The space limitation allowed only one outboard hull side to be worked on at a time.  The hull is rotated 90° and almost resting on the ground to improve access to the unfinished inside panel.    

The panels are joined together by an epoxy fillet later covered by fiberglass tape.  At this point the panel has received four sandings.  Two more sandings are required to produce a painted surface.  This is true for all the other the fiberglassed surfaces  I could go on to whine about sanding more, but I'll just leave this as a teaser to a subject covered more fully in earlier episodes.


Above the steps are provisions for a washboard.  A washboard is not used for laundry, its' function is to prevent water from washing in.  A quadrilateral wash board will slip into the openings groove and close up the boat's interior.


Above are the two inboard cabin sides are laid next to each other.  The lower one is an exploded arrangement of the washboard components.  The narrower spacer pieces determine the width and depth of the washboard groove surrounding the opening.  Notice that the groove will exist on the left and right sides, but not the bottom.  This will allow any water within the groove to drain out the bottom.  All surfaces within the groove are sheathed in fiberglass for waterproofing.  Both sides of the spacer pieces are fiberglass sheathed to widen the groove and give the washboard an easy slip fit.

The wide and narrow parts must be held in place on the panel and epoxied together before installation.  Clear plastic tape will prevent the parts from adhering to the plywood panel.


The epoxy squeeze out is scraped out of the groove before installation.


Cut off PVC pipe form filler radiuses in the groove corners.  The radiuses prevent water from pooling in the groove corners.  Fiberglass will later reinforce the butt joints on the faces of the wide corner joins.


I could not resist getting ahead of myself and cutting out the starboard cabin top.  It is hard to photograph in the shop's small space, but I think it looks quite rakish.  The main hatch remains to be cut out, but having a top will aid in the layout planning.  The 15th gallon of epoxy was consumed in reaching this completion stage.  The plans estimate that twenty gallons of epoxy are required to  finish the boat.  Thankfully, I have another five gallons of epoxy to apply and turn into sanding dust before it is time to go epoxy shopping.  

The State of Things

The virus has only recently made its appearance in Belize.  A Belizean returned from Los Angeles with the virus to become ill on the island of Ambergris Caye.  Her mother also became ill as a result, but these are the only known cases as of yet.  Those on the island are confined to the island for the time being.

This event caused an immediate change locally.  Most business are closed and face masks are common.  Some public transportation and some basic foodstuffs are not available, welcome to the coronaverse.  If this continues for long it will be very difficult for the average Belizean who faces struggles to make ends meet in the best of times.

Right away, Cuba sent sixty doctors to help Belize deal with the virus outbreak.  It appears U.S. state governors would get more action by lobbying Cuba for help rather than the always butt hurt, very stable jackass.  A full measure of my disgust is better suited for other venues.  

Belize Scooter Travel Advisory 

I was enjoying a scooter ride and the resulting breeze during a trip home with a grocery load.  I was taking it slow and easy as a dozen eggs in a bag would not survive a monster pothole encounter.  I was so focused on the potholes that I failed to notice a very large black snake crossing the road.  The snake reared up as I scootered close to only then enter my awareness.  MAJOR FREAK OUT!!!  Thankfully, the snake folded back on himself and returned to the bush.


Wednesday, February 12, 2020

Interior Fitments

This episode marks another milestone.  All the Tiki 26 interior fitments are completed:


Above, the port galley compartment is fitted with a small shelf to the right of the companionway (steps).  A grey non skid coating awaits application to the companionway tread surfaces.  A little gray will spark things up in my mind's eye.  Below the shelf and tucked in the corner is a raceway leading wiring into the cockpit.  A screwed on panel provides access to pull wires through the hull's side.

Varnished mahogany edging completes the bulkheads and shelving edges.


For those readers who may have missed previous episodes, the stove is in the action position while resting on the footwell cover doing double duty as a table.  Can you find the footwell cover magnetically stowed in the previous image?


The starboard hull received an identical companionway, shelf and raceway as well as an extra shelf and table ledge.  

Areas above the shelves are not painted.  Installing the cabin sides will require fiberglass and epoxy in those areas.


The interior is not greatly detailed in the plans.  Hopefully I have anticipated most future needs with the interior fitments.  This portion of the project has required thought before plans could form.  It has presented awkward working and painting positions along with finicky fitups.  In short, completing the interior has been very time consuming.  Some people building these boats apply spar varnish to the interior as opposed to paint.  These folks have saved lots of time, but end up with a dark and dreary interior where I'm better pleased with a bright and cheery aspect.  This is partly a matter of how time pressed and patient a person is.  I live in Belize were patience is required, I'm retired, so my time pressure is only from the grim reaper.

I am pleased to pass this milestone and move on to more straightforward tasks that will close in the cabins (I can then declare another milestone) and lead to finishing the hull exteriors.  From what I have read, fairing (smoothing) a hull can be mind numbing work and I may long for the days of interior fitment, but today I'll doubt that.  Regular readers will know there is sanding in my future.

In closing this milestone celebration I offer  interior images to better illustrate the ground covered:

Starboard aft compartments prepared to receive aft deck.
Aft deck ready for installation

Forward Bunk
Starboard forward bunk ready to receive deck
Forward deck ready for installation

Starboard head compartment, sans head


Friday, January 10, 2020

Navigation/Engineering Station


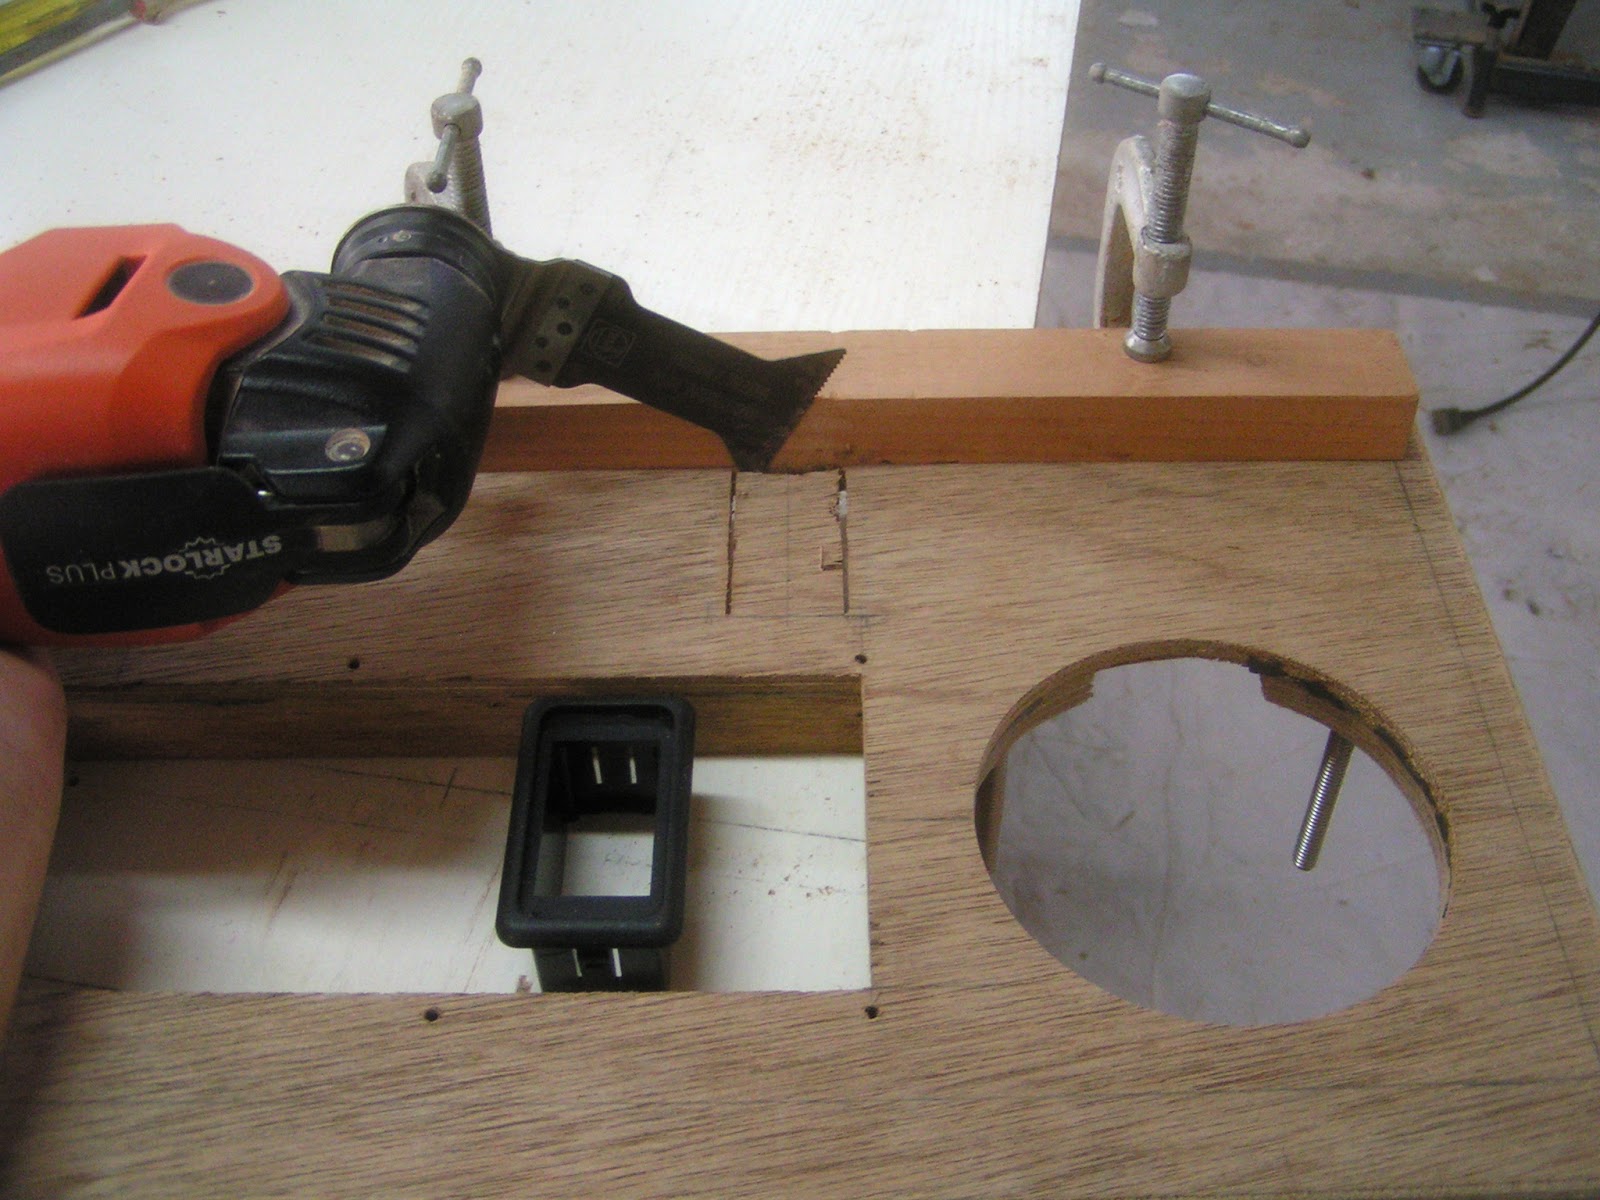
Here a cut out is made to fit the black electrical switch mount resting in the rectangular cut out.  The oscillating multi-tool makes quick work of it.  It can make plunge cuts and flush cuts against a clamped on wooden straight edge to provide precisely located cuts.  You likely need a multi-tool, but may not know it yet.


The last mana shipment provided wiring terminals, shrink tubing, wire markers and other sundries needed to make progress on the wiring system.  Above, the three blue solar charge controller positives are wired to the battery via a fuse panel on the right.  Above the fuse panel is the negative terminal strip.  A heavy black cable connects it to the current measuring shunt before connecting to the battery negative terminal.  This arrangement makes it possible to measure and track all current entering or leaving the battery.  This measurement coupled with battery voltage enables the battery monitor to report the state of charge.


I'm a fan of the streamlined art deco style, some of that may have brushed off here.  Think back to some of the vacuum tube radios if you are old enough.

The charge controllers are enclosed behind the panel above.  This panel contains a shelf to support the removable navigation table spanning the hull width.  The upwardly angled, circular battery monitor is above the shelf on the right.  

The charge controllers will always be energized and producing heat.  Slots cut under the shelf and the two horizontal varnished pieces provide cooling ventilation for the energized equipment.


Here the navigation table is installed as far aft as possible.  This position permits a second person to sit more comfortably on the table's forward side.  Ideally, the second person would be someone you would enjoy tangling legs with beneath the table. 

I'm rather pleased with this navigation/engineering station.  There is room for a VHF radio installation in the blank space next to the switch panel if anyone is shopping for my next birthday present.


The aft bulkhead has received paint as well as varnished edge moldings.  This compartment in both hulls have unpainted inboard hull sides.  Companionway stairs provide interior access and will be located on the inboard side along with additional shelving.  These items remain to complete the interior fitments.  

The companionway's location is dependant on the main hatch location and configuration.  There is much to untangle here before a plan takes shape.


The center bulkhead has received paint as well as varnished edge mouldings.  As in the port hull, the starboard hull has a goose necked lamp, a 12 volt outlet as well as two USB outlets.  

Recent blog episodes have installed components long held side due to precursor operations.  Suddenly it seems, many interior areas are at or approaching the finished state.  It is gratifying for me to see this project starting to look like something, but still a long way from the completed state.  I'm newly encouraged to solder on.