Following up from the last episode where the solar panels were installed .....
A 100 ampere hour LiFePO4 battery rests comfortably in its' new home in the starboard hull. The solar charge controllers attached to this battery have Bluetooth. This feature allows me to monitor the battery's state of charge as well as the solar output through a tablet in my living room. These days I'm up before the sun and have watched the solar system go through the off, bulk, absorption, float and off states of charge. This might be the sort of thing that only an engineer would enjoy and find highly gratifying as the system works perfectly.
It seems I have some wires in the background lacking neatness. This adds to things on the needing attention list. What should be done with the newly installed power?
The goose neck lamp and power outlets are functional. I learned that the lamp has a dimming function for those who wish to set a mood. It also has a red light to preserve night vision or to better establish the mood. Long time readers may remember that the power outlets have a USB outlet and a 12 volt cigarette lighter outlet. These could be useful elsewhere.
Outlets are located fore and aft in the cockpit. These outlets will keep the navigation tablet powered as well as powering cockpit lights while anchored.
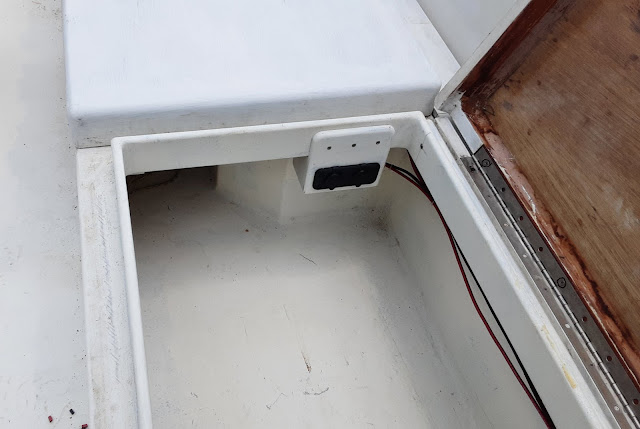
I was surprised to learn that I had bought more outlets than I intended. Outlets are now installed in both cockpit aft lockers. These outlets could be used to charge the outboard batteries over a period of several days, but I consider this an unlikely event. Lights and other rechargeable items could be plugged in and locked up while the boat is unattended. I've developed a wish list for items I might leave plugged in here. There are electric thrusters that strap onto your arm and pull you through the water like a one armed superman. Electric air pumps allow you to stay submerged for extended periods. These are just a few ideas if I should be on your Christmas list.
Gluing jigs are sometimes necessary when assembling items. Here the outlet boxes are surrounded by scrap wood screwed to the table to hold the pieces square. Rubber bands provide a clamping force. The scrap wood is covered with packing tape to prevent adhesion to the outlet boxes.
I decided to deviate from the plans here and build a mast tabernacle. I believe the tabernacle will provide a more stable configuration as I single handedly step (raise) the mast.

The squared off section is the beginnings of a mast. The tabernacle saddles the mast step on the forward cockpit crossbeam . In time a clamp will be replaced with a through bolt after the tabernacle is epoxied together. The mast will pivot on the through bolt as it is raised from a horizontal position to a vertical position.
The plate facing the cockpit will receive hardware for handling the halyards (sail raising/lowering lines). I await the hardware to complete the tabernacle in the next episode.
My remaining marine plywood is 3/8" thick. I didn't feel like this thickness was enough for the loads encountered so two thickness were laminated together to achieve a 3/4" thickness. Thanks to router patterning bits it is easy to turn out identical parts.
Not shown in this initial stage of the parts bearing the word master, is a square cut out that allows the mast to pivot to a horizontal position.
Here the tabernacle parts are having six ounce fiberglass applied to the edges. Push pins hold the fiberglass in place as the epoxy is brushed on. Cuts are made on both sides of the fiberglass where there is a transition from a straight run to the curved section. Epoxy is applied to the straight sections first to stabilize the fabric's position then the push pins are removed and additional side cuts are made along the curved section so the fabric will lay down against the piece.
The tabernacle "fork" pieces on the right hand side received stiffening from the application of 1708 fiberglass fabric on both faces. 1708 is a much heavier fabric that I applied in three layers to protect the keels in groundings.
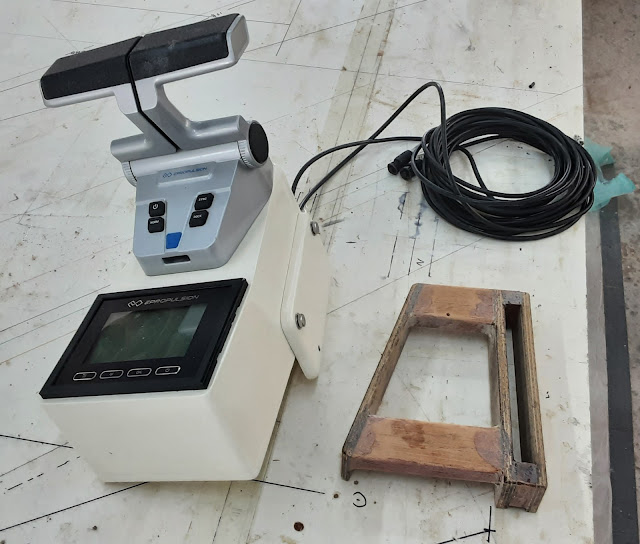
On the left is the electric outboard control unit. The throttle levers are too stiff to operate without the unit being tied down. In operation, this unit is held to the aft cockpit locker lid by a thumb screw. The thumb screw goes through a hole in a plate extending below the control unit's base. This plate does not allow the control unit to sit stable and flat when stowed away.
To the right is the control unit stowage stand. The slot receives the projecting plate and limits fore/aft and side to side movement. The remaining elevated surface supports the control unit base.
Here the control unit rests on its' stowage stand just behind the motor battery. This large locker is getting filled up before I'm even started.
Here we are again with gluing jig and the beginnings of the stowage stand. What is different is a white template under the plastic that directs part alignment.


.jpg)
You’re getting closer and closer….💯
ReplyDelete